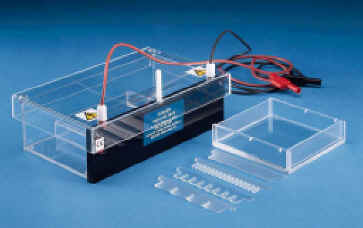
Continuing with the mutation of the VHL tumor suppressing gene experiment, the previous PCR products will ge run on agrose gels, and the PCR DNA will be purified for later use.
40 microliters of the PCR product will be run on teh gel via the following method.
- Pipet 2 small dots containing 4 microliters of DNA loading buffer onto a peice of parafilm.
- For PCR A, remove 40 microliters from the PCR tube by pipet and mix with the 4 microliters of DNA loading buffer by pipetting up and down a few times on the parafilm
- Pick up the mixed sample and load it inot one of the large wells on the gel, using the 10-100 microliter pipette, releasing slowly
- Repeat steps 2+3 for the PCR B. Leave an empty well between A and B PCR samples. There will be other samples from other groups sharing the same gel. A DNA ladder will be put into the first lane.
- Gels will run at 200 Volts for 20-30 minutes.
- The gel is then stained in ethidium bromide for approximately 20-30 minutes and then visualized under ultraviolet light.
- The glowing band of DNA will be cut out with a scalpel, taking care to get as little of the gel and as much of the DNA as possible.
- The two cut out bands will be placed into seperate eppendorf tubes, labeled, and will be used to extract the DNA itself later.

Unfortunately, upon following this procedure, it was found that no DNA from teh original PCR was present. There was no banding seen on the agarose gel, for any of the group samples, whereas the ladder did show banding. The staining was permited to continue for approximately another 20 minutes, with new concentrated ethidium bromide added to the staining solution, still the PCR bands failed to show up, stronly indicating that there simply was no PCR DNA.
Upon review, it was discovered that the orignal stage of the experiment was missing a critical component, the dNTPs, from which the PCR DNA is built out of.
The orignal stages were repeated with the correct procedure. After repeating the steps above, the bands did appear, and those bands were cut out and set aside in eppendorf tubes for later stages.
While the above gel was running for the second time, the remainder of the DNA (approx 40microliters) was purified using columns and buffers from the QIAquick PCR purification kit, using the following procedure.

- Add 5 volumes of Buffer PB to 1 volume of the PCR sample and mix. Since 40 microliters of sample are left, 200 microliters of buffer is used.
- Place a QIAquick spin column in a provided 2ml collection tube
- Apply the sample to the QIAquick colum and centrifuge fro 1 minute to bind the DNA
- Discard the flow-through. Place teh QIAquick column back into teh same tube.
- Add 0.75 ml Buffer PA to teh QIAquick column and centrifuge for 1 minute, to was the sample.
- Discard flow thru and place the QIAquick column back into the same tube and centrifuge for an additional minute.
- Place the QIAquick column in a clean 1.5ml microcentrifuge tube
- To elute the DNA into the microcentrifuge tube, add 30 microliters of water to teh center of the QIAquick membrane, allow it to sit for o1 minute to increase the DNA concentration, then centrifuge for 1 minute.
Now a restriction enzyme digest of this purified DNA will be set up, using the following protocol:
- Add 4 microliters of 10x Buffer#2 to the eluted DNA
- Add 4 microliters of BSA to the tube
- Add 2 microliters of the premade enyxme mix to teh tube (composed of HindIII/XhoI)
- Mix the contents ths far by setting the pipet to 25 microliters and gently pipetting up and down 2-3 times
What is now had is a tube containing a total volume of 40 microliters (the 309 microliter water+DNA sample, and the combined 10 microliters above). It is important to not hold the base of the microcentrifuge tube and thus warm it, because the restriction enzyme are refrigerated and are very heat sensitive.
This tube is now incubated at 37 degrees Celsius overnight, stored, and then used in later steps.
By this time the gels have run and have been stained and are ready for viewing (with UV protective face shields) via UV illumination. 
The ethidium bromide is UV reactive and also binds with DNA, thus when illuminated with UV light, the locations of the DNA bands, which have moved during electrophoresis, show up as glowing bands, similar to the gel phot shown below, however in this experiment there is only a single band (excluding the bands in the ladder DNA row), because only one fragment has been prepated (per row, the PCR row A, and PCR row B). It is these bands that are now cut out and placed into eppendorf tubes for later procedures.


No comments:
Post a Comment